
Villain Assembly Guide

Step 1: Prepare to assemble the base
Here are all the items necessary for the base.
- Mouse Base
- Mouse Skates
- (4) M2x5mm Titanium Screws
- 250mAh Battery
- Scyrox V8 Main PCB

Step 2: Place mouse skates onto the base
Feel free to place skates wherever you want! The guides are suggestions.
Helpful Tips
-

Remember to remove the plastic protector on each skate.
-

Our recommendation is to place at least 4 dots as shown.


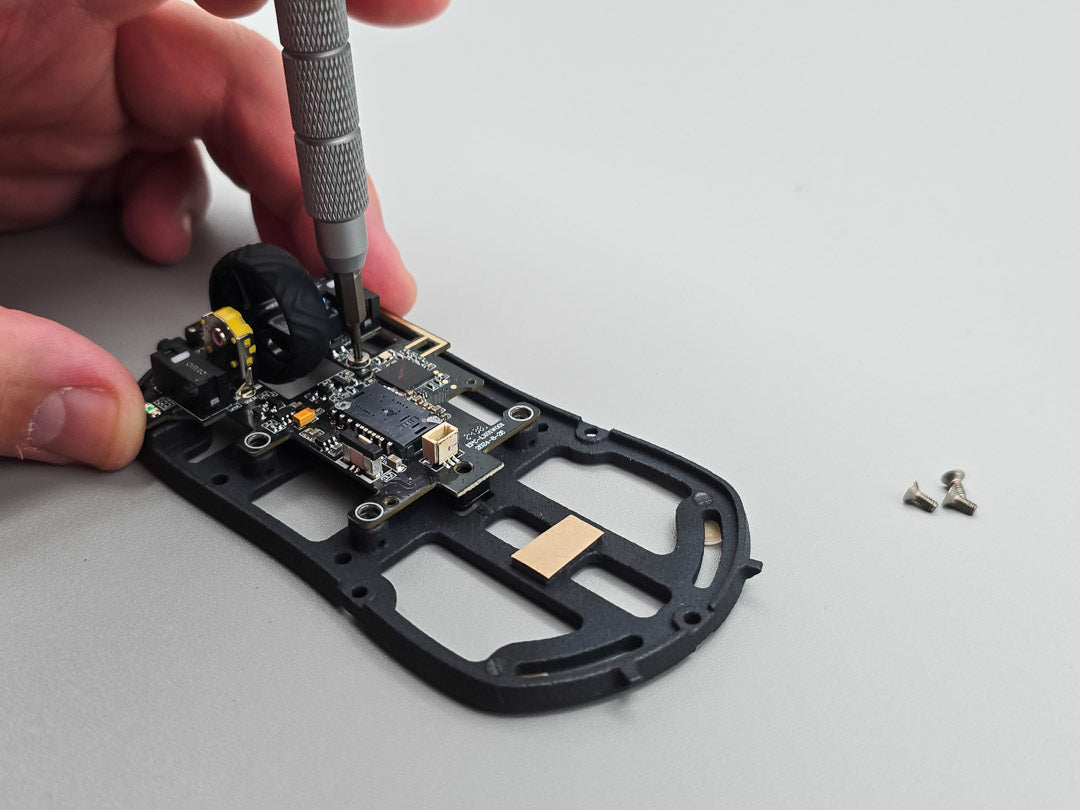
Step 3: Attach the Scyrox V8 Main PCB
Use the (4) M2x5mm titanium screws to attach the PCB to the base.
Helpful Tips
-

Partially tighten each screw until all 4 screws are in the base. Then proceed to fully tighten the screw.
-

Position the PCB so that the screws center around the white marks on the PCB.


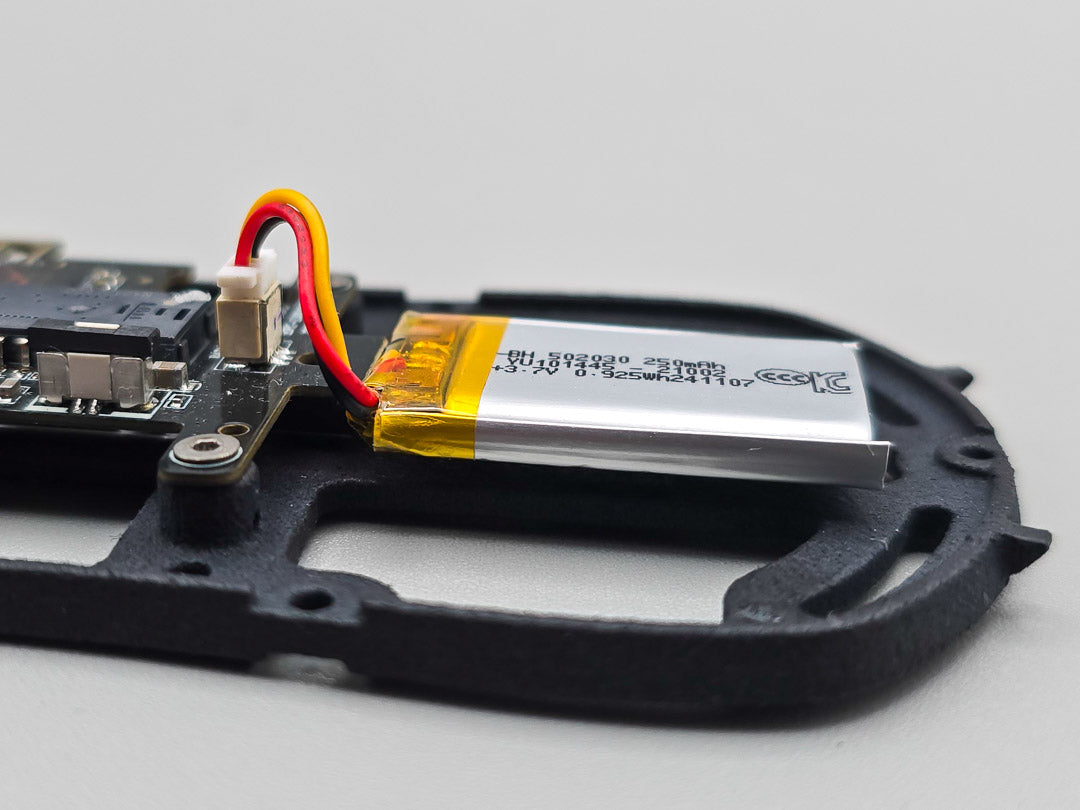
Step 4: Attach the battery.
Remember to turn the mouse **OFF** before attaching the battery for best practices.
It is also a good habit to test the battery now to make sure the mouse turns on.

Step 5: Prepare to assemble the top shell
Here are all the items necessary for the base.
- Mouse Top Shell
- Aluminum Foil Tape
- (2) M2x5mm Titanium Screws
- Scyrox V8 Side Button Daughterboard

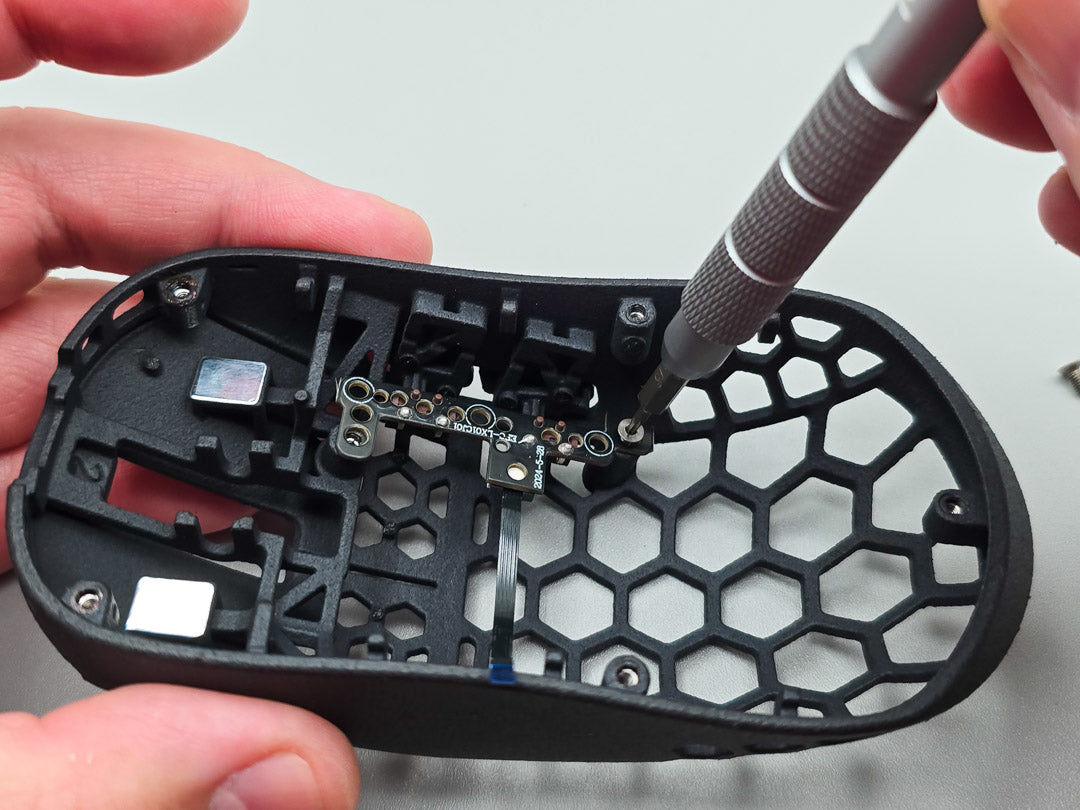
Step 6: Tuning the left and right clicks
The left and right clicks will **NOT** click before this step is finished.
Start by adding 1 piece of aluminum foil tape to each of the clicks.
We expect the final number to be between 5-7 layers.
Helpful Tips
-

Test the clicks by putting the top shell over the base without screws. If the clicks are not to your liking, you can repeat Step 6 again to continue tuning the travel on the clicks.
-

Left and right clicks might require different number of layers to feel most optimized for you. We expect most shells to take between 6-7 layers of tape for optimal click feel.


Step 7: Adding the side button daughterboard
Mount the side button daughterboard with (2) M2x5mm titanium screws
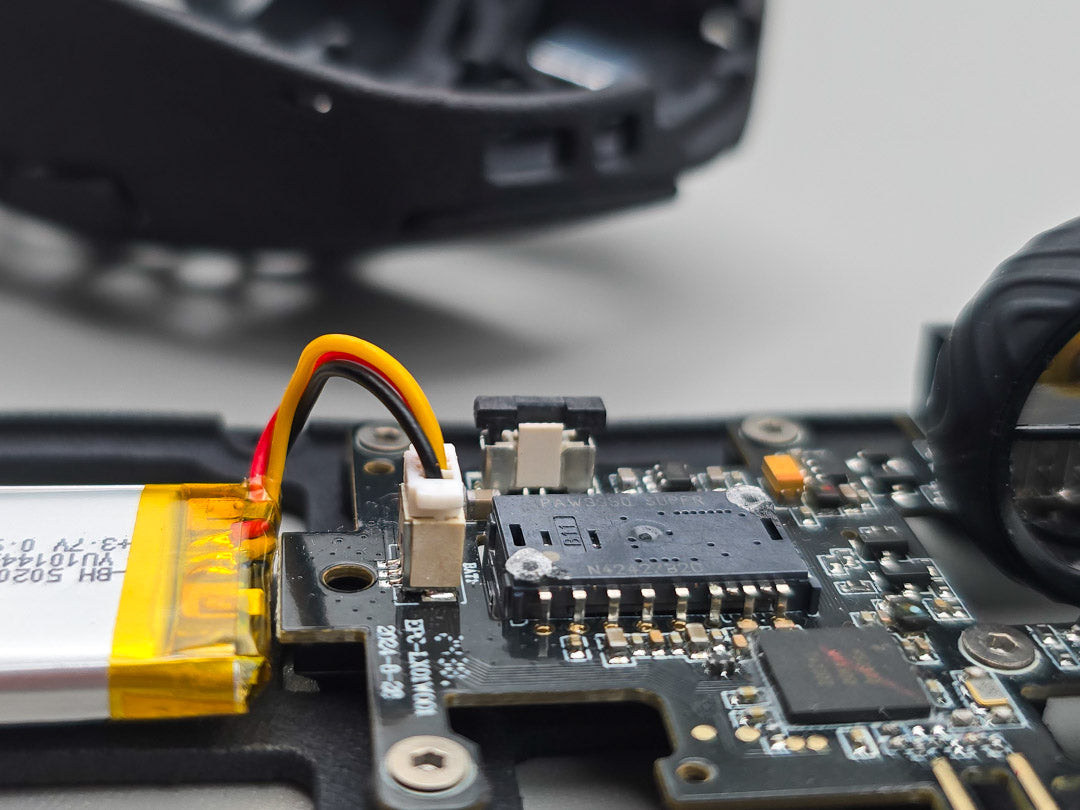
Step 8: Connect the daughterboard to the main PCB
Attach the ribbon cable to the main PCB using the black latch. Start by lifting the latch for the cable.
Helpful Tips
-

The ribbon cable inserts into the latch with the white portion facing the camera as shown.
-

After closing the latch, turn on the mouse to give the buttons a test before closing the shell.


Step 9: Close the shell
Use (5) M2x5mm titanium screws to close the shell. (2) M2x5mm screws are left over as extras, in case a screw is lost or damaged.