
Scyrox V8 Disassembly
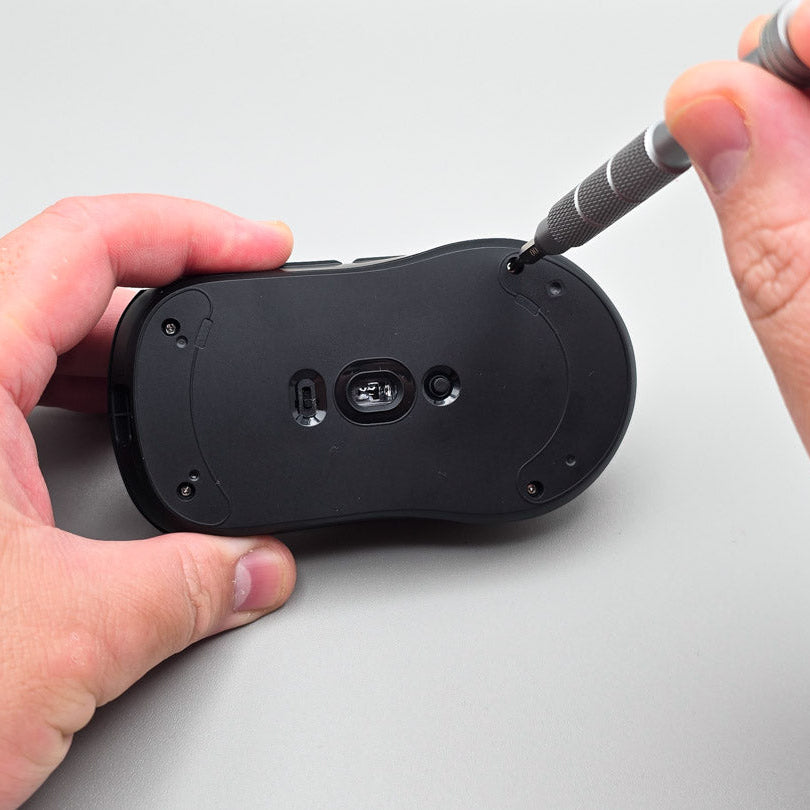
Step 1: Remove the 4 bottom screws
Use a Phillips #00 screwdriver, fully remove all four screws on the bottom of the mouse. These screws are all the same length.
- If your mouse has adhesive mice feet already applied, use a plastic spudger to remove the feet.
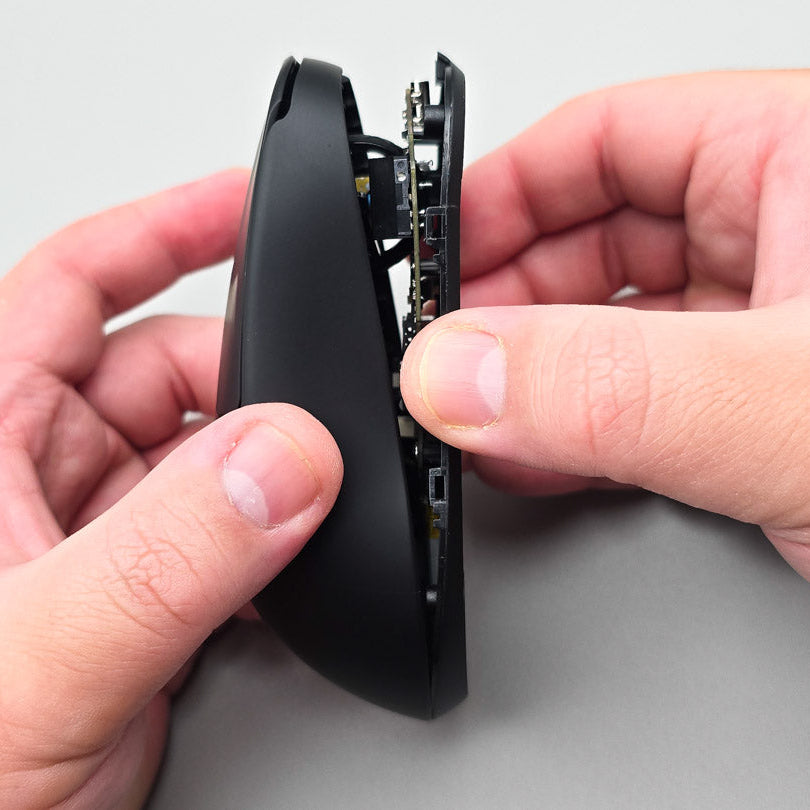
Step 2: Separate the top shell from the base
Starting from the USB-C port, slowly start separating the top shell from the base. Internal clips prevent the shell from opening naturally, so pry the walls outward when necessary, until you hear the clips click.
Do NOT fully remove the top case at this point as it is still secured by a thin ribbon cable.
Open the shell in clamshell motion, hinged on the left side of the mouse.
- A plastic spudger may be used to be release the clips. Be careful as the clips are easier damaged.
Helpful Tips
-

An example of the internal clip is shown here.
-

Prying the wall outward can help release the clips.
-

Be careful about the ribbon cable when opening the mouse!


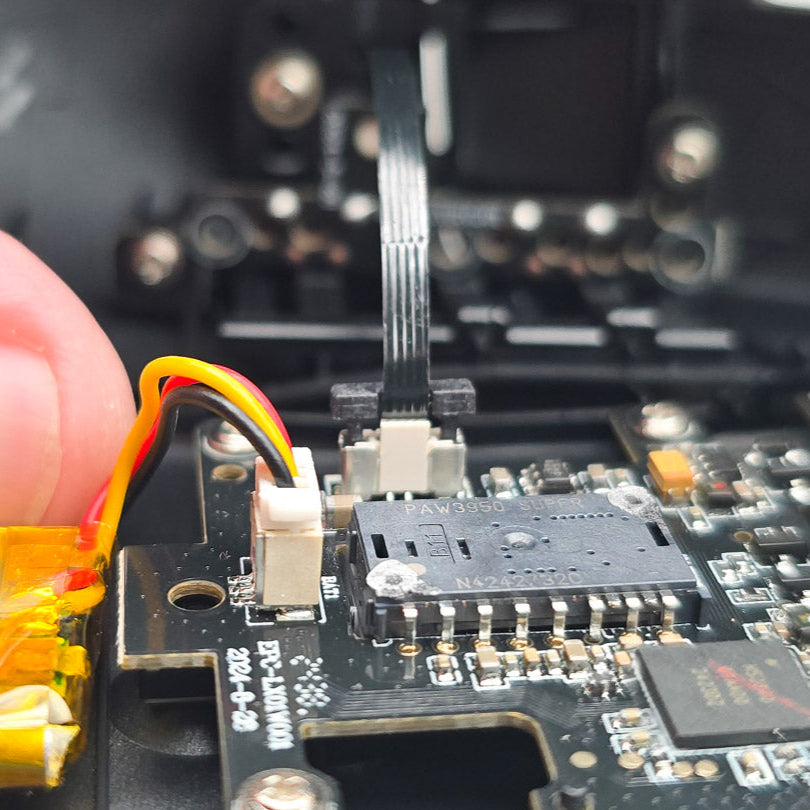
Step 3: Remove the ribbon cable to separate the shells
Carefully lift the black latch using your fingers or a plastic spudger to loosen the ribbon cable.
Using a gentle back and forth motion, slowly pull the cable out of the slot, being careful to avoid depressing the latch again.
Helpful Tips
-

Once the cable comes out, the top shell will fall loose.
-

Remember to close the ribbon cable latch back afterwards to prevent damage.


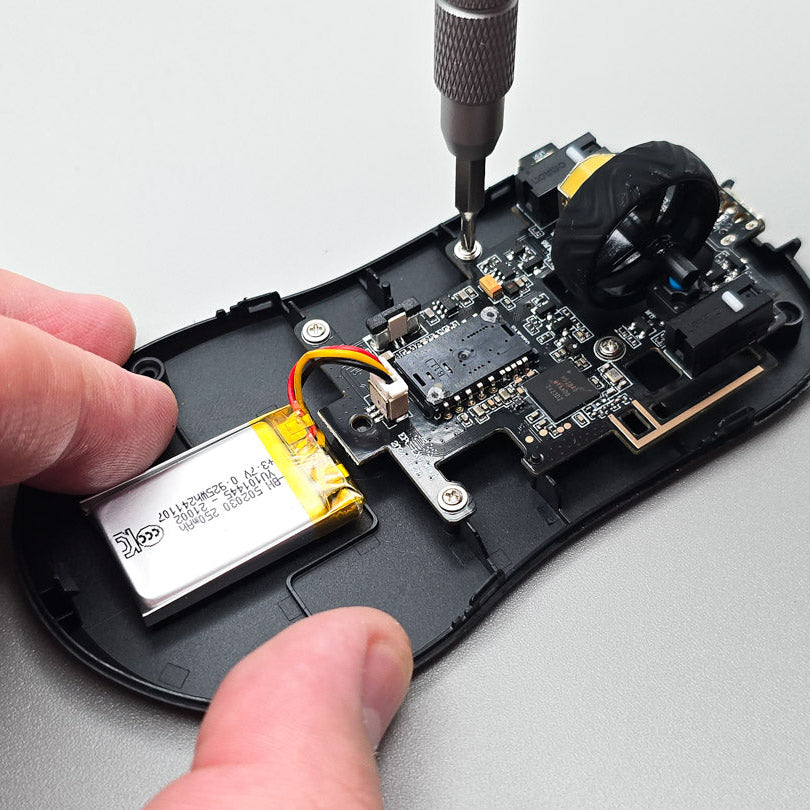
Step 4: Remove the PCB screws
Use a Phillips #00 screwdriver to remove the four gray screws holding the PCB in place.
- The PCB is lightly secured by the casing and may not come out immediately.
- These screws are all the same length but differ from the screws in Step 1.
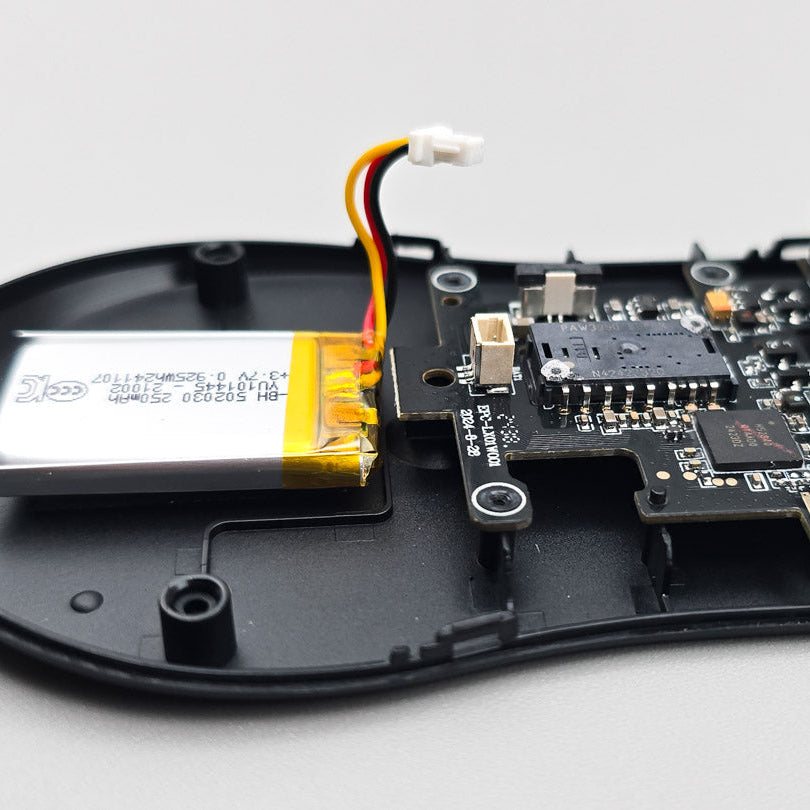
Step 5: Disconnect the Battery
Carefully disconnect the JST header so that the PCB can come off the plastic base.
Be careful when working with Lithium-ion batteries and avoid puncturing or damaging the battery as it may present a fire hazard if damaged.
- During reassembly, use your fingers or a plastic spudger to reconnect the JST connect. Ensure that it is fully seated.
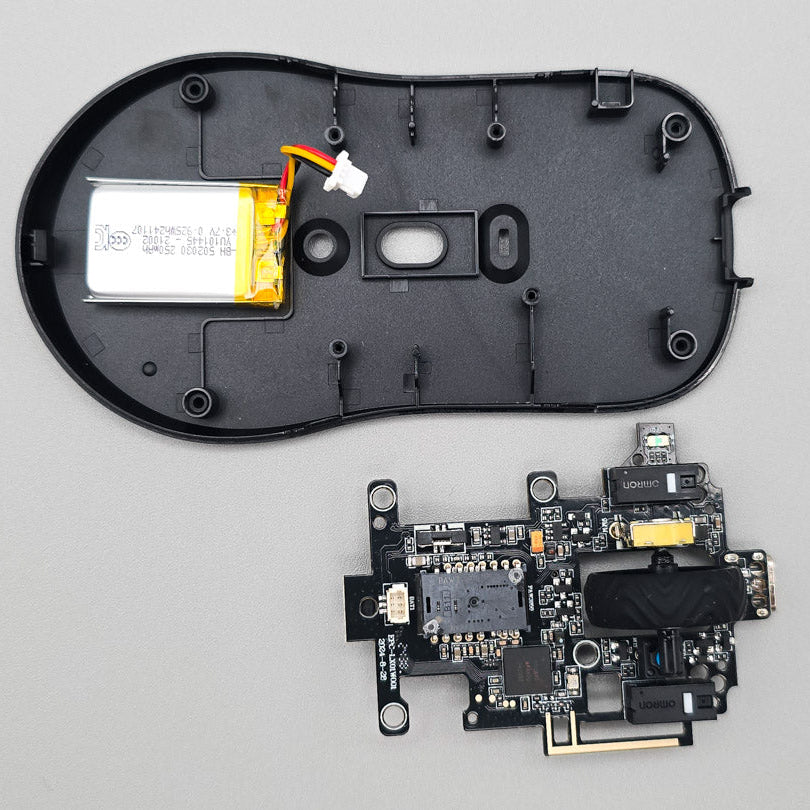
Step 6: Separate the PCB from the base
Gently pry the PCB away from the base, using the plastic spudger. The PCB is lightly held in place by plastic features in the casing.
- During reassembly, these plastic features will not hold the PCB in place. This is not an issue as the PCB will be held securely by screws.
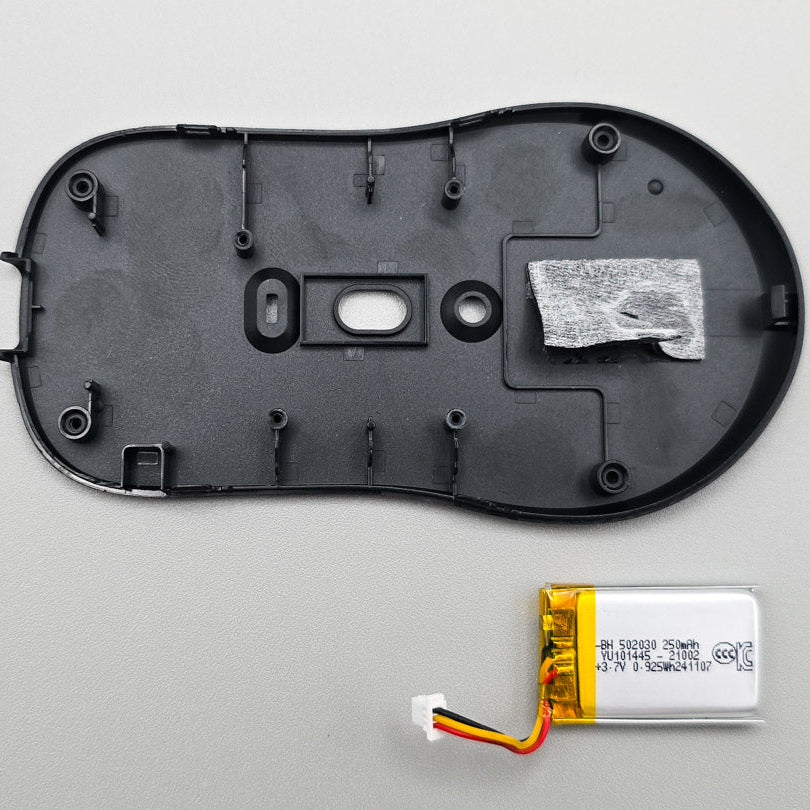
Step 7: Remove the battery for the new modkit
Use the plastic spudger to carefully pry the battery away from the plastic adhesive. During reassembly, this adhesive can be reused.
- Do NOT puncture or otherwise bend or damage the battery during this process.
Helpful Tips
-

Carefully insert spudger under the battery to avoid damaging the metallic wrapper.
-

Lift the adhesive pads to free the battery, not the metallic wrapper.


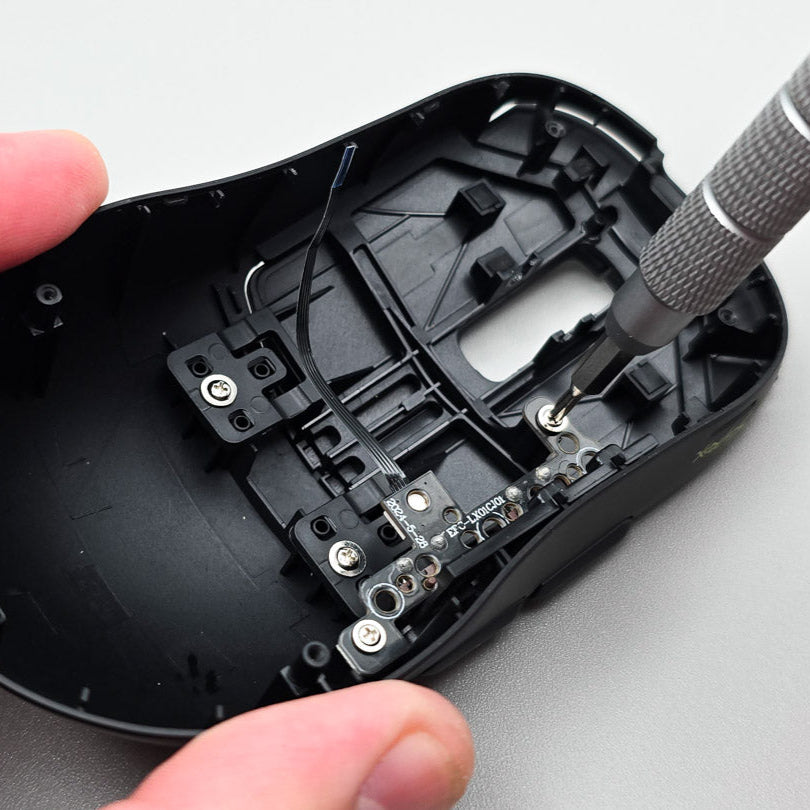
Step 8: Remove the Side Button daughterboard
Use a Phillips #00 screwdriver, remove the two screws securing the Side Button Daughterboard in place.
Use a spudger to pry the Side Button Daughterboard out of the top case, as it is also lightly held down by the casing.
- Be careful to not damage the delicate ribbon during this process.